🔒 How to Stake
Step-by-step Staking to Birdeye Plus
To start staking, make sure your wallet has enough SOL tokens and is connected to Birdeye Plus.
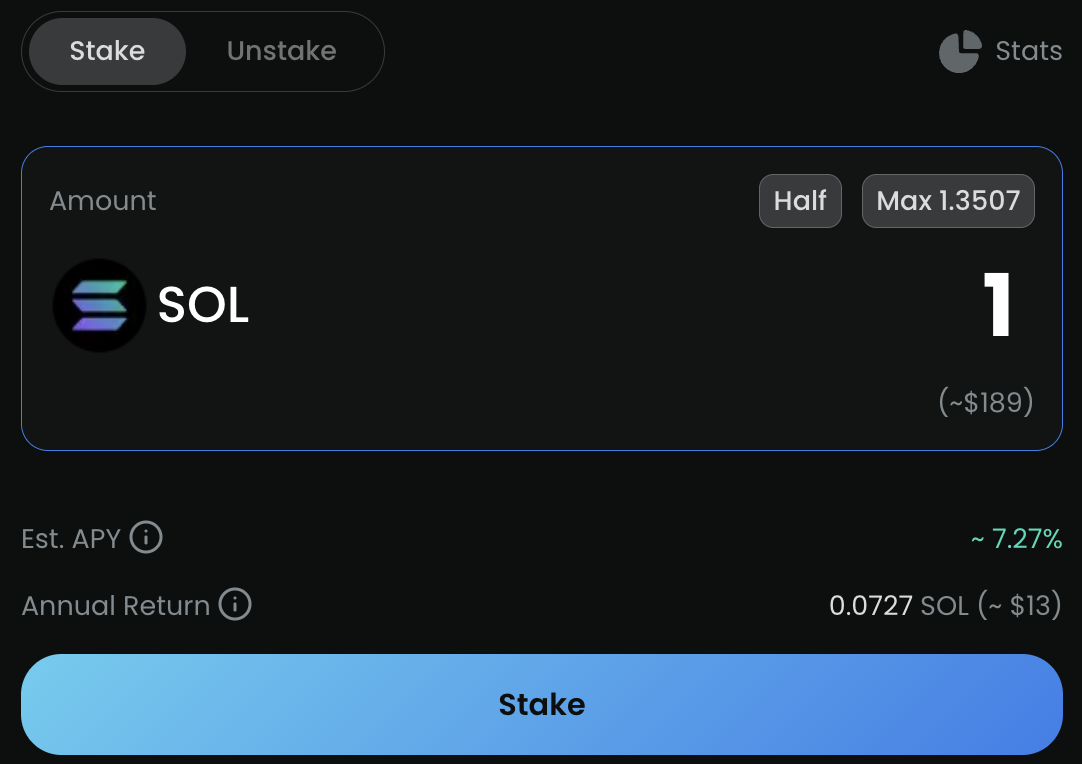
Step 1: Choose Your Staking Amount
- Navigate to the Stake section.
- Select the amount of SOL tokens to stake to the Birdeye Plus and click on the Stake button.
Step 2: Confirm the Staking Transaction
- Double-check the staking details and confirm the transaction through your wallet.
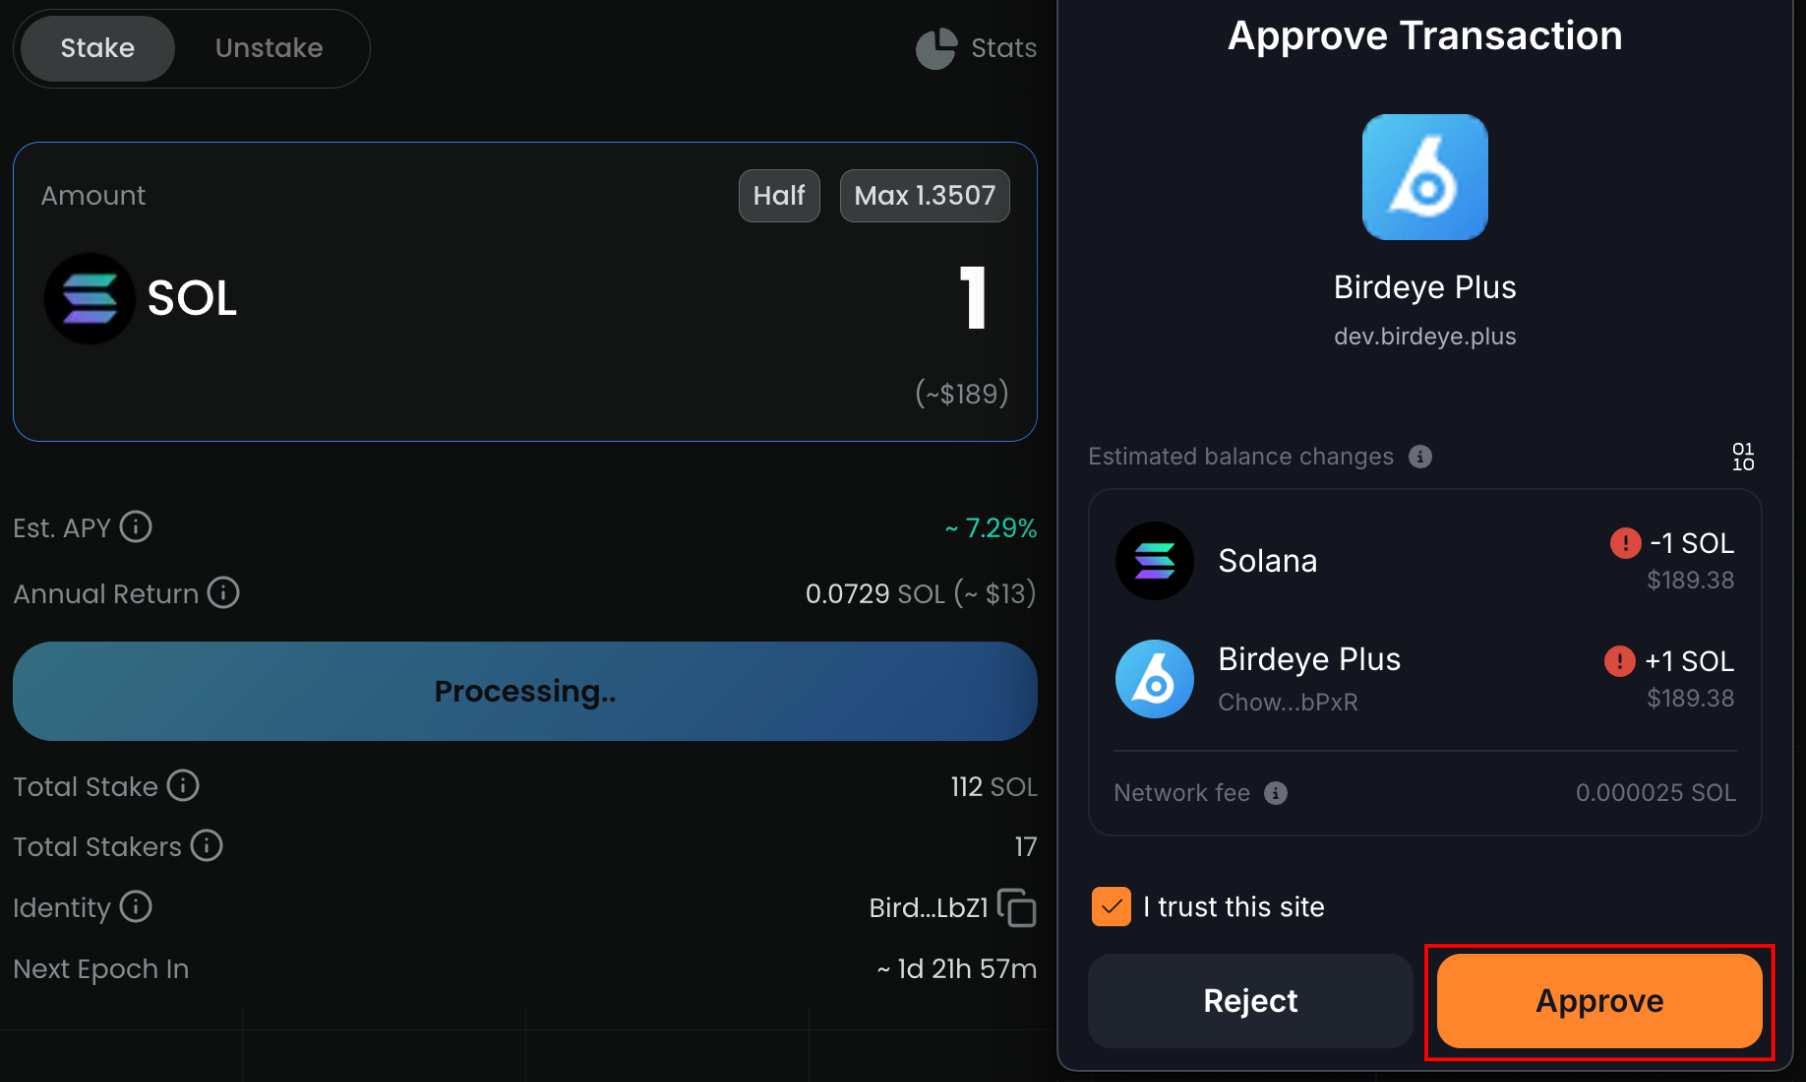
Example from Solflare wallet
- Wait a few moments for the transaction to be completed.
Step 3: Waiting for Activation Period
- Once you’ve delegated your SOL to Birdeye Plus, the stake will enter an activation period, which typically lasts 1 epoch (approximately 2 days depending on epoch length).
- During this time, your SOL is in the process of being activated and will start earning rewards once the next epoch begins.
- You can monitor the status of your stake account in the Unstake section, where it will show as "activating."
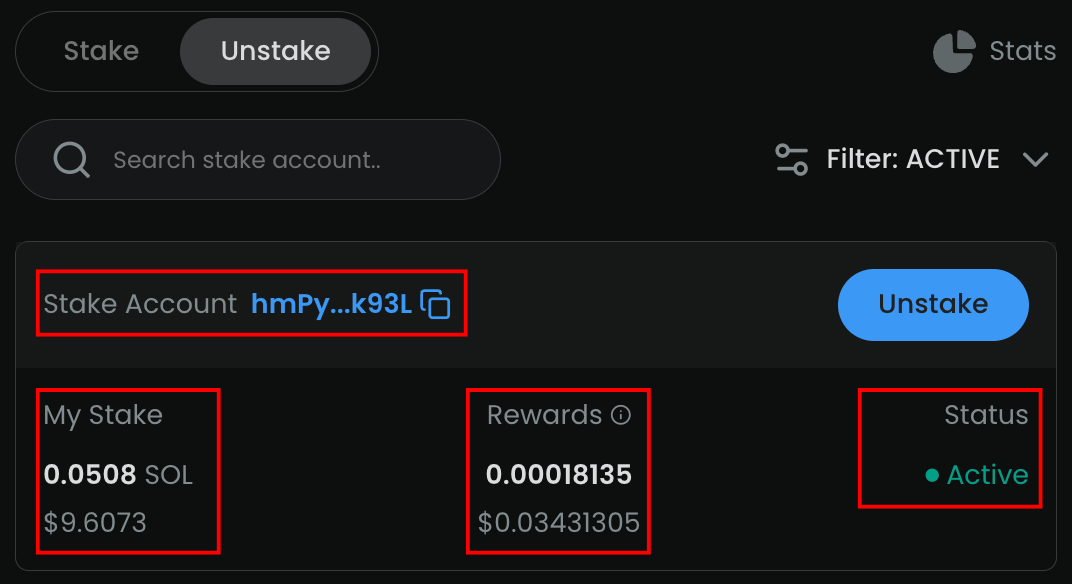
Monitoring Your Staking
Once you've delegated your SOL to the Birdeye Plus Validator, it's important to track the progress of your stake to ensure everything is running smoothly. You can easily check the status of your stake in the Unstake section. The section will provide you with the following key information:
- Stake Account Address: The unique address of your stake account to differentiate your stakes.
- My Stake: This stat is the total amount of SOL you’ve delegated to the Birdeye Plus.
- Rewards: Staking rewards will be calculated from the last activation, allowing you to track the growth of your stake.
- Status: This stat will show the progress of your staking request. As mentioned above, your newly staked tokens are considered “activating” or “warming up”, and are not eligible to earn rewards until fully activated.